7 Garage tricks you probably missed
The Garage's best features don't announce themselves. Scene hotkeys, live-forking community wraps onto your car, AI that starts from your current design, and the Blueprint panel's surgical mode, all in one tour.


A month after launching the Garage, I've watched enough people use it to notice a pattern: everyone finds the big stuff (click the car, text lands on the car) and almost nobody finds the shortcuts underneath. Some of my favorite features are apparently secrets. Fixing that now.
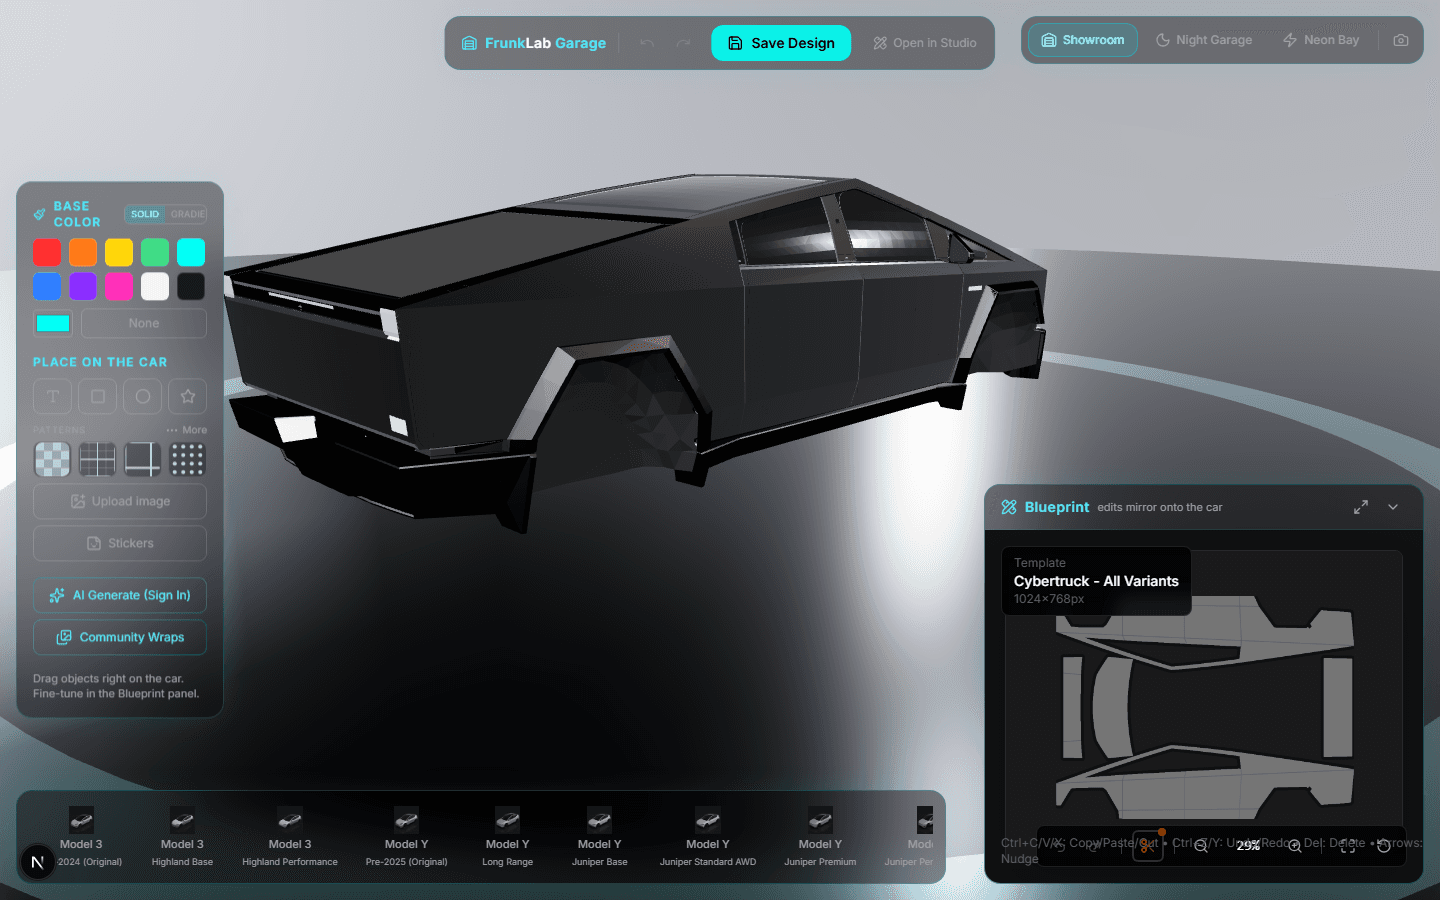
1. The number keys switch scenes
The scene switcher works fine, but the keyboard is faster: press 1 for the Showroom, 2 for Neon Bay, 3 for Cyber Garage, and on up to 7. The Showroom has a light and a dark mode, flipped with the sun and moon button next to the scene name. The whole point of scenes is rapid-fire comparison, because a palette that sings under bright showroom lighting can flatline in the dark. Flipping the Showroom between light and dark while staring at your hood is the two-second version of walking around your car at different times of day.
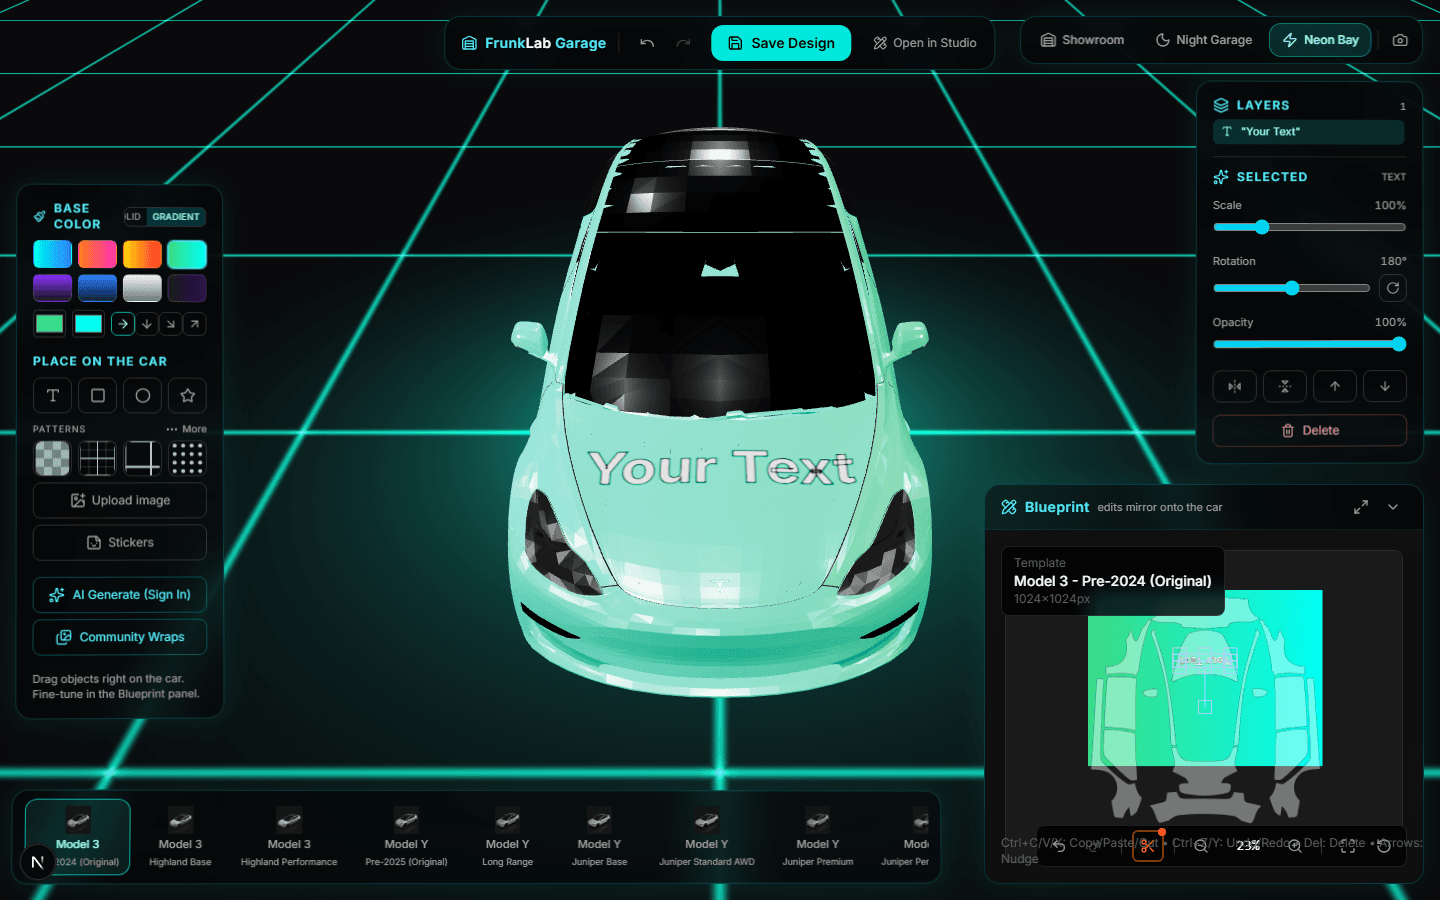
2. The floor is telling you something
The floor glow and grid tint aren't decoration, they follow your wrap's dominant color. When you recolor the design, the whole bay shifts with it. It's the fastest gut-check I know for whether a palette actually works: if the room your car lights up looks wrong, the wrap is wrong. I use it constantly and I built the thing.
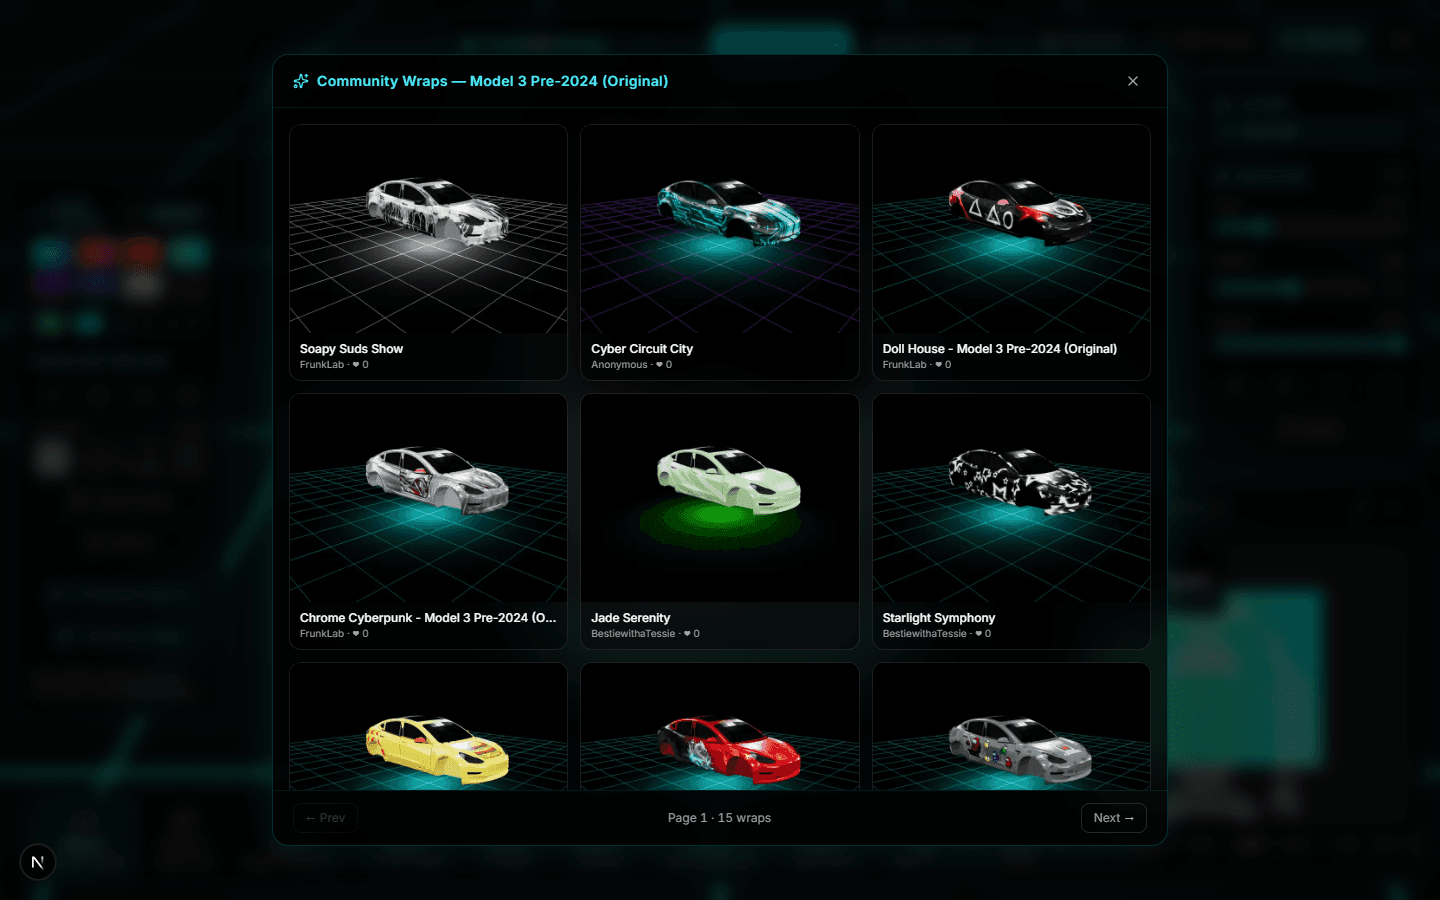
3. Community wraps render on YOUR car
Open the community browser inside the Garage and flip through gallery wraps. Here's the part people miss: every wrap you focus renders live on your car, your model, your angle, not on a thumbnail of someone else's. A design made on a Model 3 previews on your Cybertruck before you commit to anything.
Find one you like, hit Customize, and it forks into your editor as a full editable design. The gallery stops being a museum and starts being a parts bin.
4. The AI starts from your design now
The AI Tesla wrap generator in the Garage has one upgrade that changes how you use it: it can take your current design as a reference. Lay down a base gradient and some text, then ask for "this but with a carbon fiber texture behind it," and the AI riffs on what's actually on your car instead of imagining from zero.
The workflow it enables is human-first, AI-second: you set the structure, the AI does the texture pass. Our tutorial on AI wrap prompts covers phrasing, but the reference feature means your best prompt might be the design you already started.
5. Gradient chips show the truth
The base color section has a Solid/Gradient toggle, and the 8 gradient presets (Sunset through Midnight) render their chips with the exact same math that paints the car. What you see on the chip is what lands on the body, angle and all. Pick the one that's 90% right, then tweak, it beats building from scratch every time.
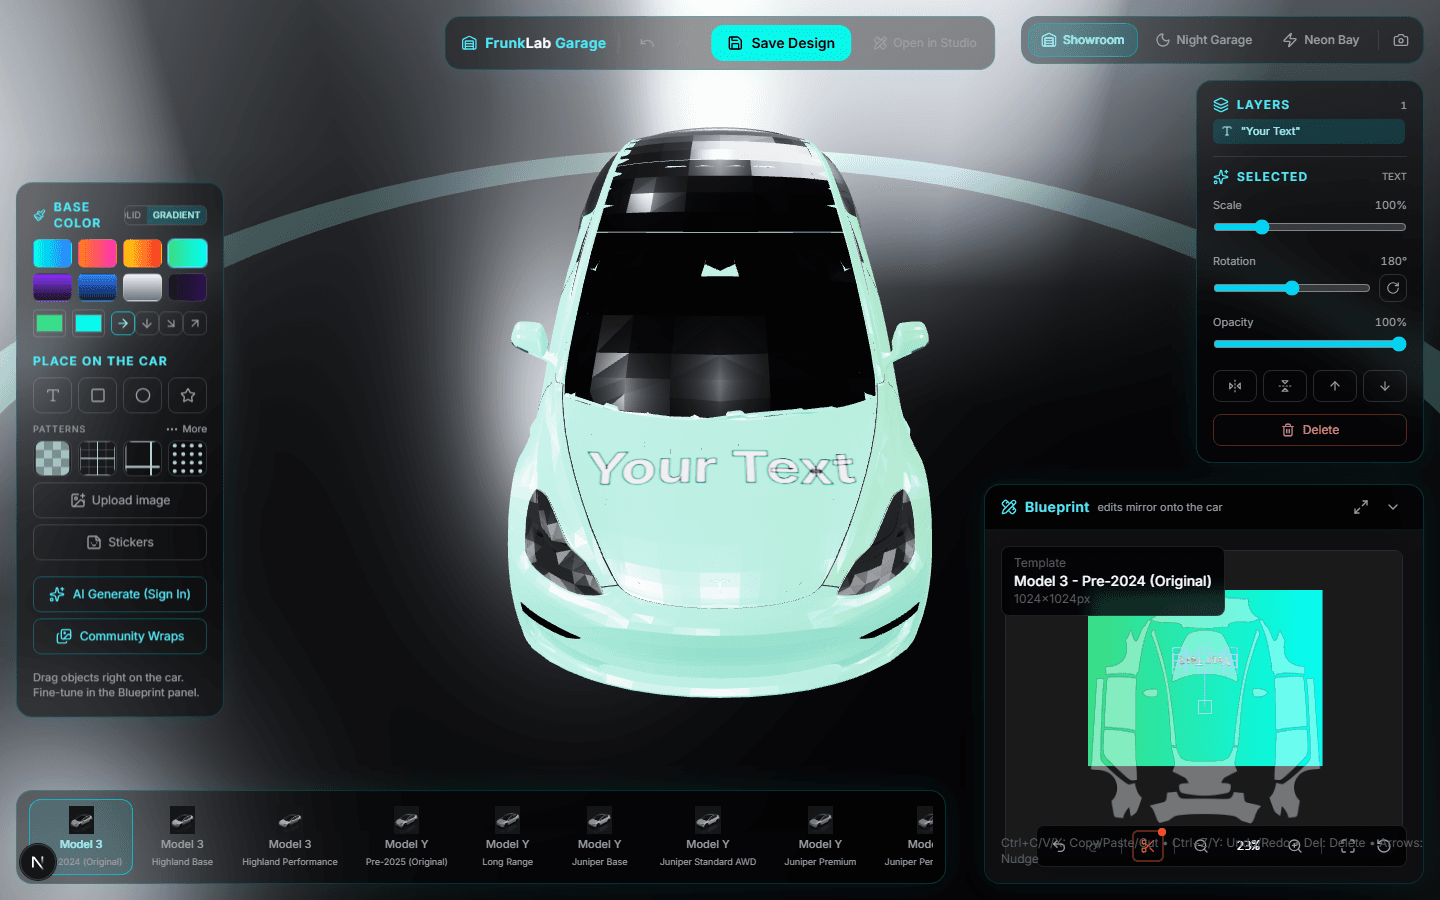
6. The Blueprint panel is surgical mode
The flat template didn't go away, it moved into the Blueprint panel, and it's still the precision instrument. Pixel-perfect alignment, layer ordering, marquee selections: all there, all live-mirrored to the 3D car as you work. (Update: the brush and both erasers now work directly on the 3D body too, so the Blueprint is no longer the only place to paint or erase. It's the precise place.) My actual workflow is 80/20: block out the design on the car, then open the Blueprint for the fussy last inch. If you learned on the classic studio, everything you know works in there unchanged.
7. Undo doesn't care where you did it
Ctrl+Z in the Garage undoes your last action whether it happened on the 3D car, in the Blueprint panel, or via a dock tool. One history, every surface. Combined with drag-to-move directly on the body (the camera freezes while you drag, so the car holds still), you can work loose and fearless. The undo stack has your back either way.
The meta-trick
All seven of these compound. Fork a community wrap onto your car, AI-riff on it with your design as reference, fine-tune in the Blueprint, then tap through the scenes with the number keys to stress-test it under different lighting. That's a complete design pipeline in about ten minutes, and every step of it is free to try.
Open the Garage and go find number 8.
Put a custom wrap on your Tesla
Free community designs for every model, or make your own in the browser.


