Designing in the Garage, a first lap in the 3D editor
The Garage is FrunkLab's newest editor: instead of designing on a flat template and checking a 3D preview afterward, you design directly on a live 3D model of your Tesla. This walkthrough takes you from an empty car to a saved design in about 10 minutes. If you've never made a wrap at all, the first-wrap tutorial covers the basics that apply everywhere; this one is specifically about working in 3D.
One note before you start: the Garage wants a desktop browser. On a phone you'll be pointed to the classic studio, which works great there.
Step 1: open the Garage and pick your Tesla
Head to frunklab.com/garage. The car loads in the middle of the screen with a tool dock beside it and a vehicle dock for switching models.
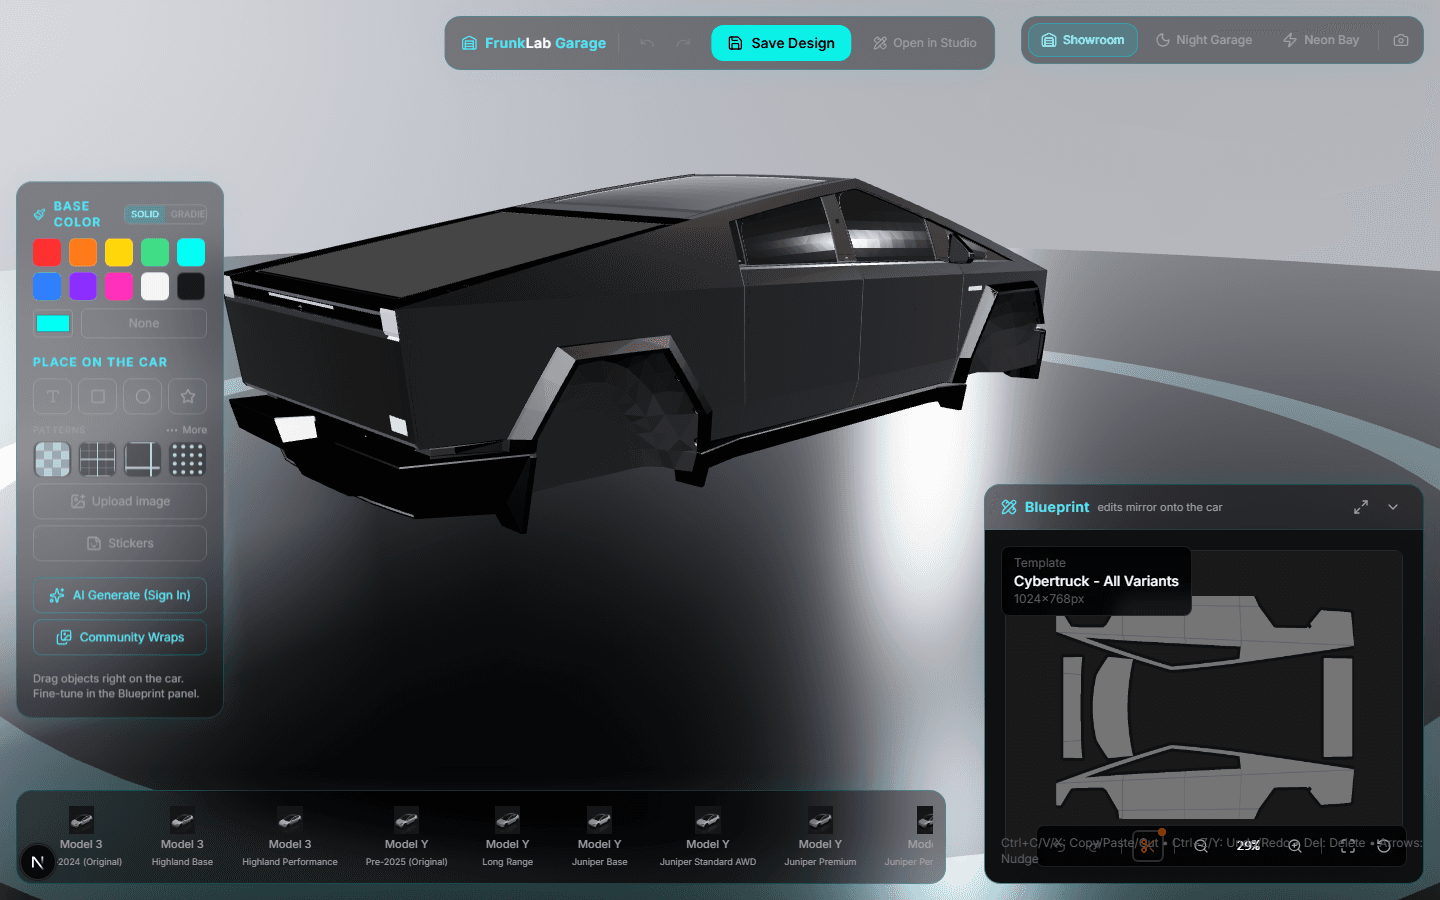
The Garage covers every 3D-capable Tesla: Model 3 (including Highland), Model Y in its variants, and Cybertruck. If you've set your Tesla in your account, the Garage opens it automatically. Model S and Model X are 2D-only for now, so they live in the studio; the supported-models guide explains the split.
Drag anywhere on the empty backdrop to orbit the car. Scroll to zoom. You'll be doing this constantly, so get a feel for it first.
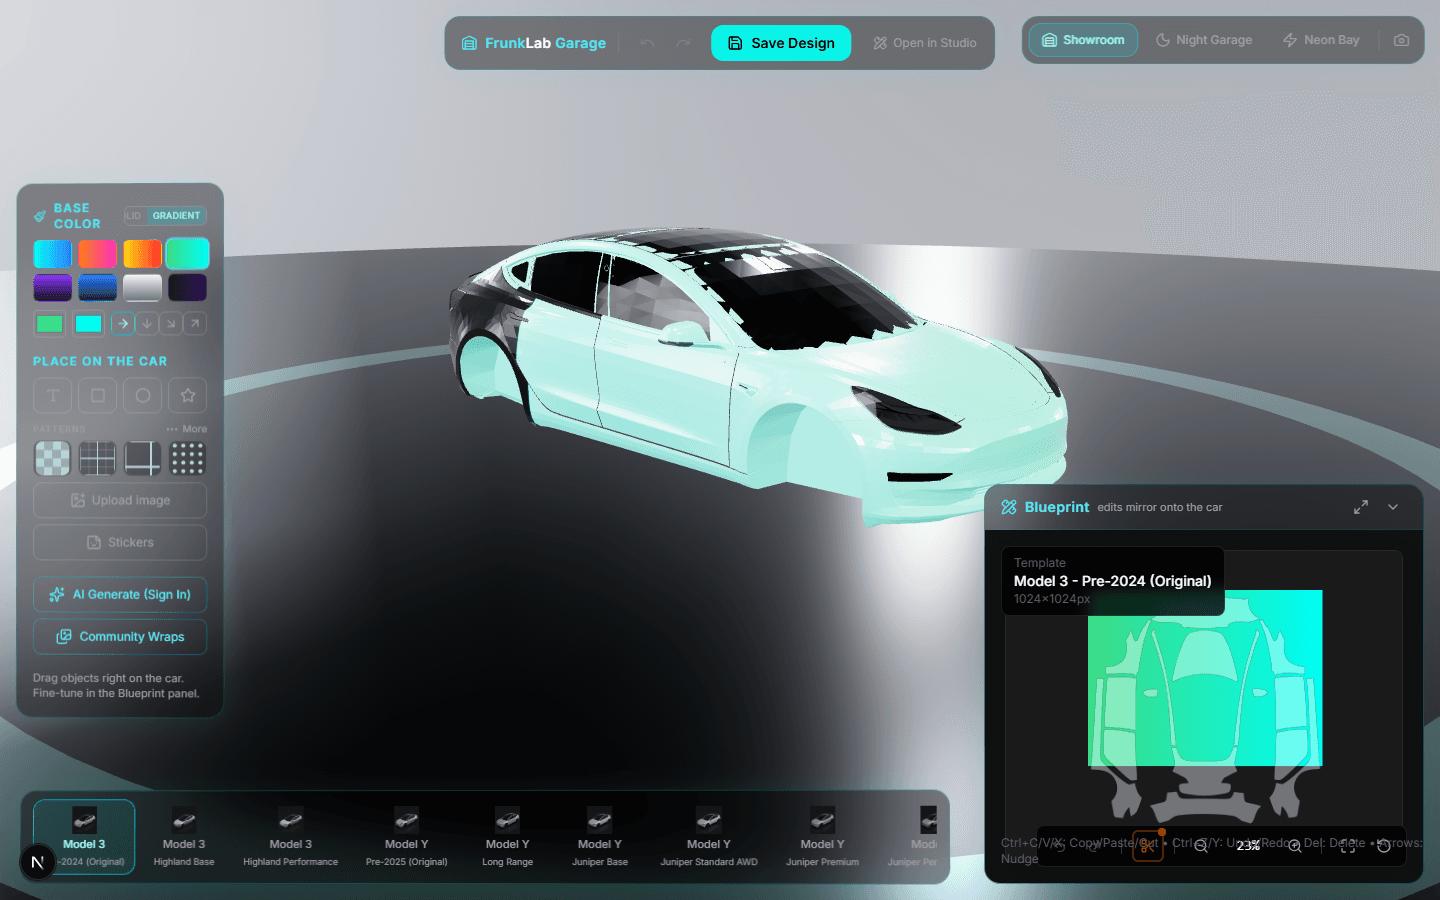
Step 2: lay down a base coat
Open the base color tool in the dock. You get two modes:
- Solid: a color picker plus quick swatches. Pick a color and the whole car repaints instantly.
- Gradient: 8 presets (Sunset, Cyber, Inferno, Aurora, Galaxy, Ocean, Chrome, Midnight). Each chip shows the actual gradient, and what you see on the chip is what lands on the car.
Start with a gradient even if you think you want a solid. Watching Aurora sweep across a Cybertruck is the fastest way to understand how the flat design maps onto the body.
Step 3: add a pattern
The pattern tool shows live swatches: carbon fiber, hexagons, topographic lines, animal prints, 26 in total. The first row covers the popular ones and a More button opens the full set, organized by category.
Patterns place like everything else in the Garage: select one, then click the car where you want it. You can cover a single panel or repeat it across the whole side. Patterns are also the best-behaved layer type for beginners since there's no orientation to worry about.
Step 4: put text on a panel
Select the text tool. A placement banner appears at the top of the screen telling you the tool is armed, with a cancel button and a place-at-center shortcut if you'd rather not aim.
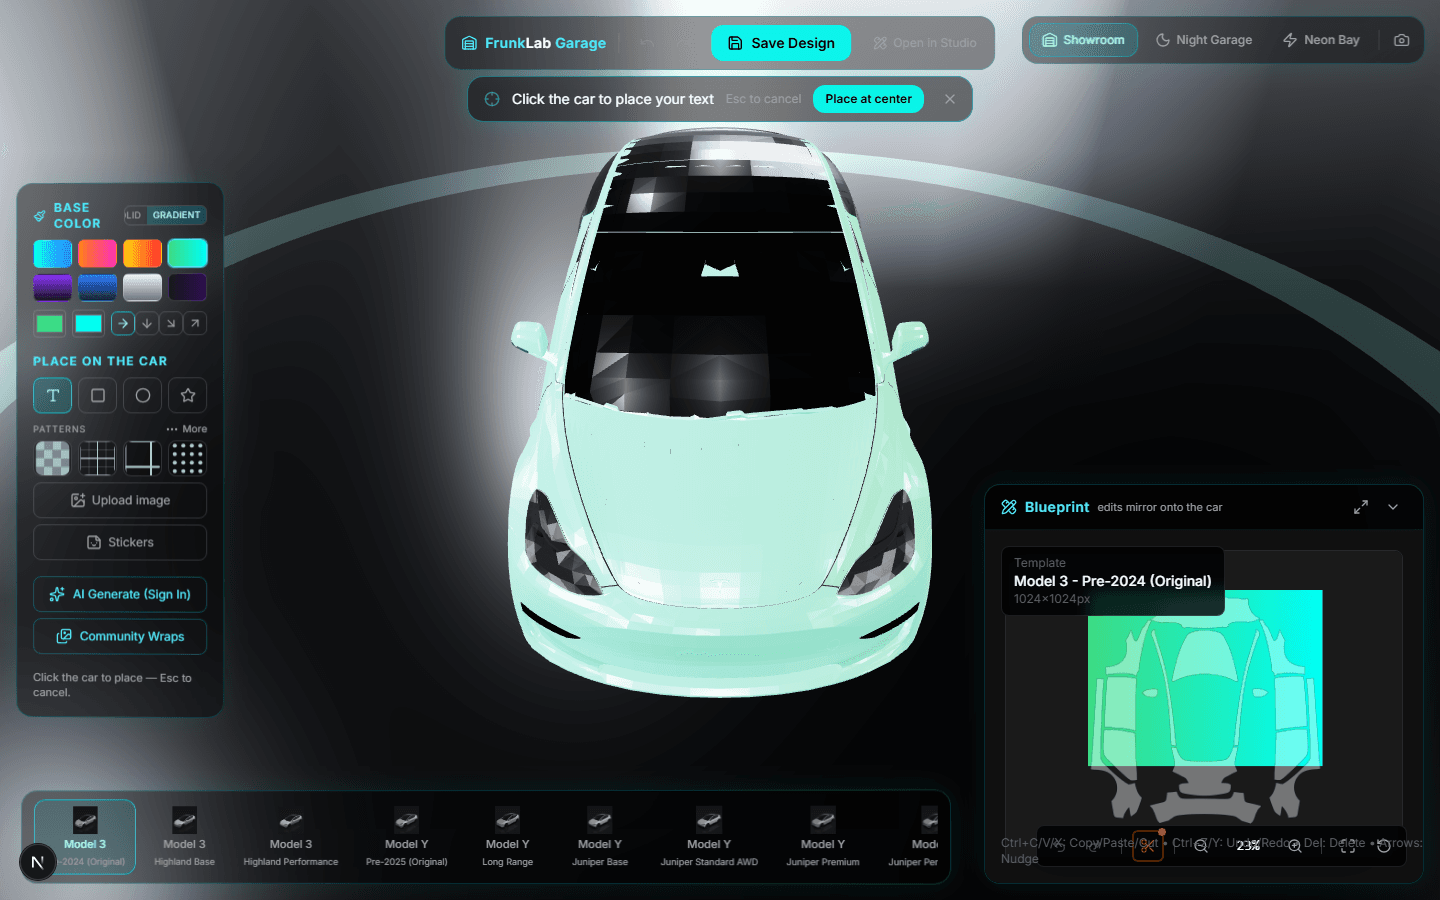
Now click the car. Click the hood, the text lands on the hood. Click a door, it lands on the door. The Garage reads which panel you clicked and rotates the text so it reads upright on the car from the outside. This is the part the old template workflow made you do by hand (and the part everyone got wrong on their first try, lettering that lay sideways on a door). Here it's automatic on every panel: hood, doors, roof, rear.
Double-click the text afterward in the Blueprint panel to change the words, font, and color.
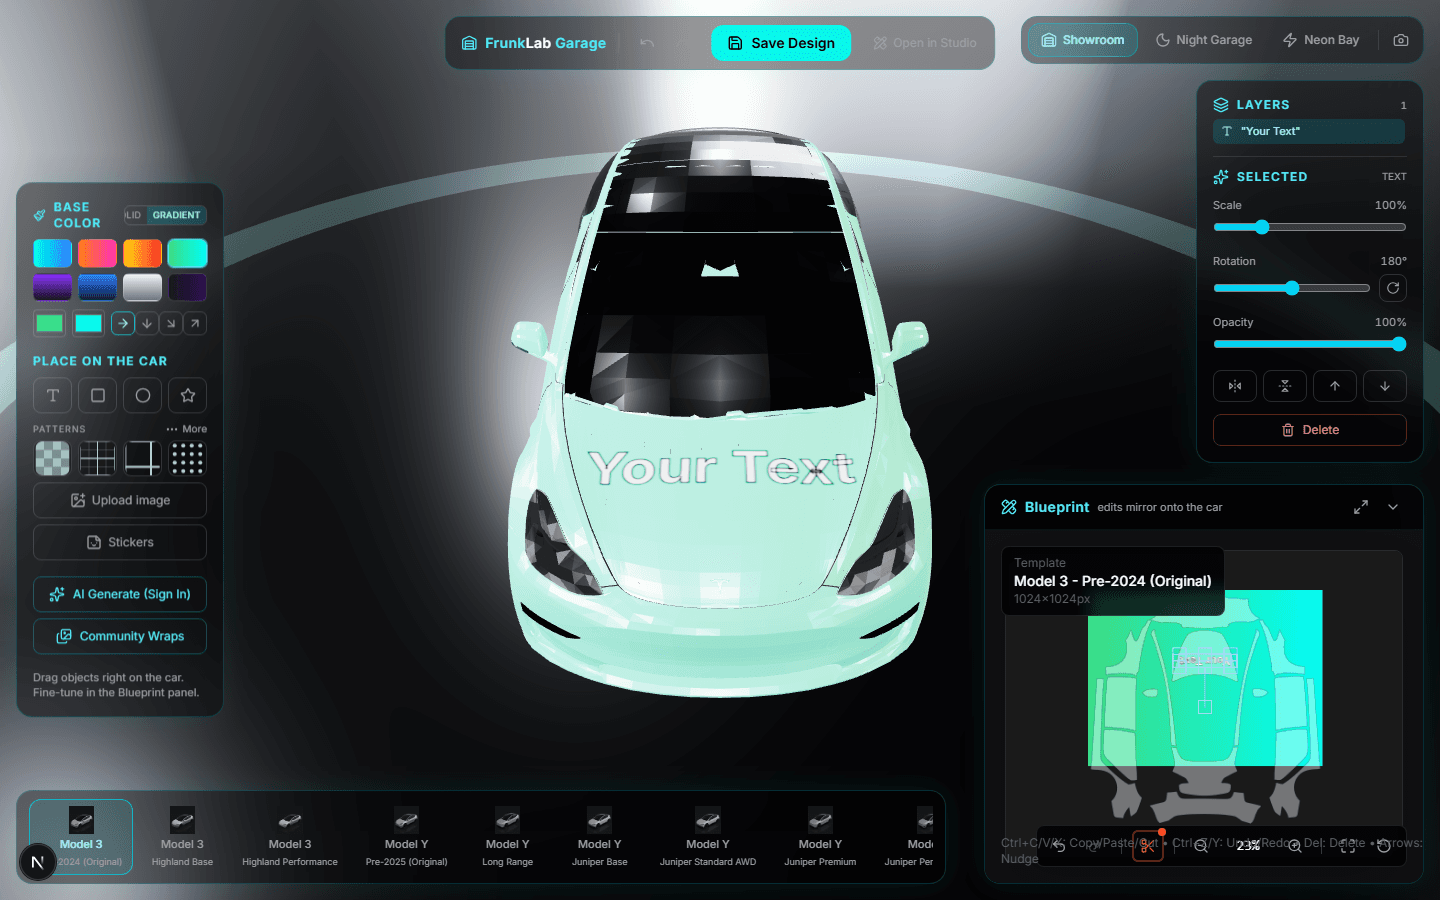
Step 5: drag it where you want it
Click and hold any placed element on the car and drag. The camera freezes while you're dragging so the car doesn't spin out from under your cursor, then frees up again when you release.
Made a mess? Ctrl+Z undoes, Ctrl+Y redoes, same as the studio. Every drag is exactly one undo step, so experimenting is cheap.
Step 6: drop a sticker
The sticker tool opens a library of 43 built-in stickers across 5 categories (flames, weather, faces, racing icons, creatures). Pick one, click a panel, and it places with the same auto-orientation as text.
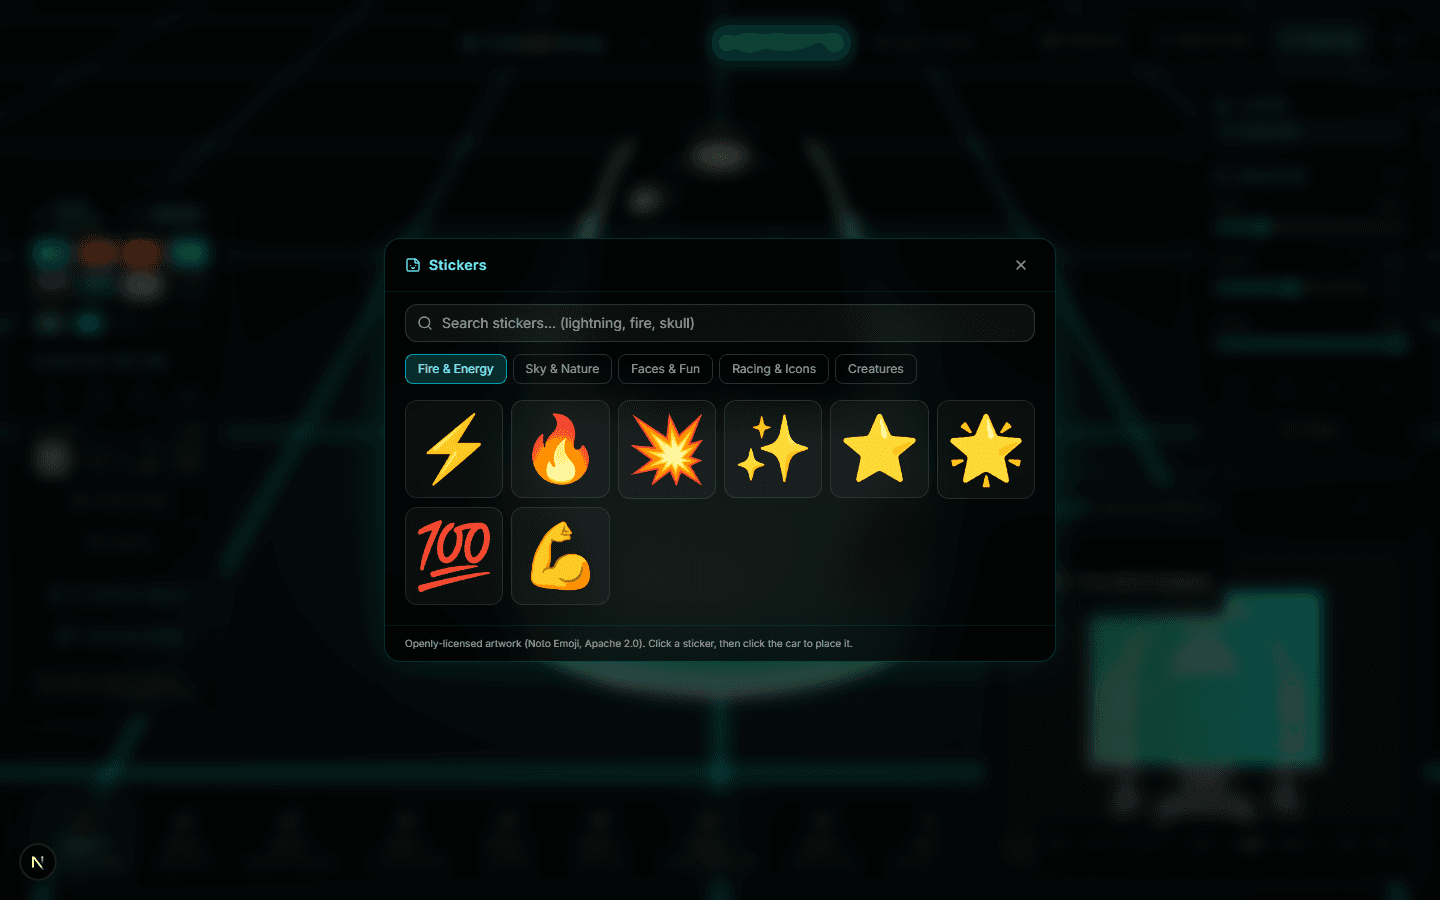
Stickers are good for rhythm: a small repeated element on the fenders ties a design together in a way one big graphic doesn't. They're regular layers afterwards, so you can resize, rotate, or delete them like anything else.
Step 7: let the AI riff on your design
Open the AI generator from the dock. In the Garage it has one extra trick: it can attach a snapshot of your current design as a reference, marked "Your design" in the reference slot. That means a prompt like "this palette, but as brushed metal with worn racing decals" starts from what's already on your car instead of a blank page.
Generation costs one AI credit like anywhere else on FrunkLab, and the result applies straight onto the live car so you can judge it in place.
Step 8: check it under 3 lights
Press 1, 2, and 3 to flip between the Showroom, Night, and Neon scenes (there's also a scene switcher on screen). The floor and ambient glow tint themselves to your wrap's dominant color in each scene.
Do this before you commit to a palette. Dark designs that look sharp in the Showroom scene can vanish at Night, and hot colors that feel loud in daylight look right at home under Neon. Thirty seconds of scene-flipping saves a redesign later.
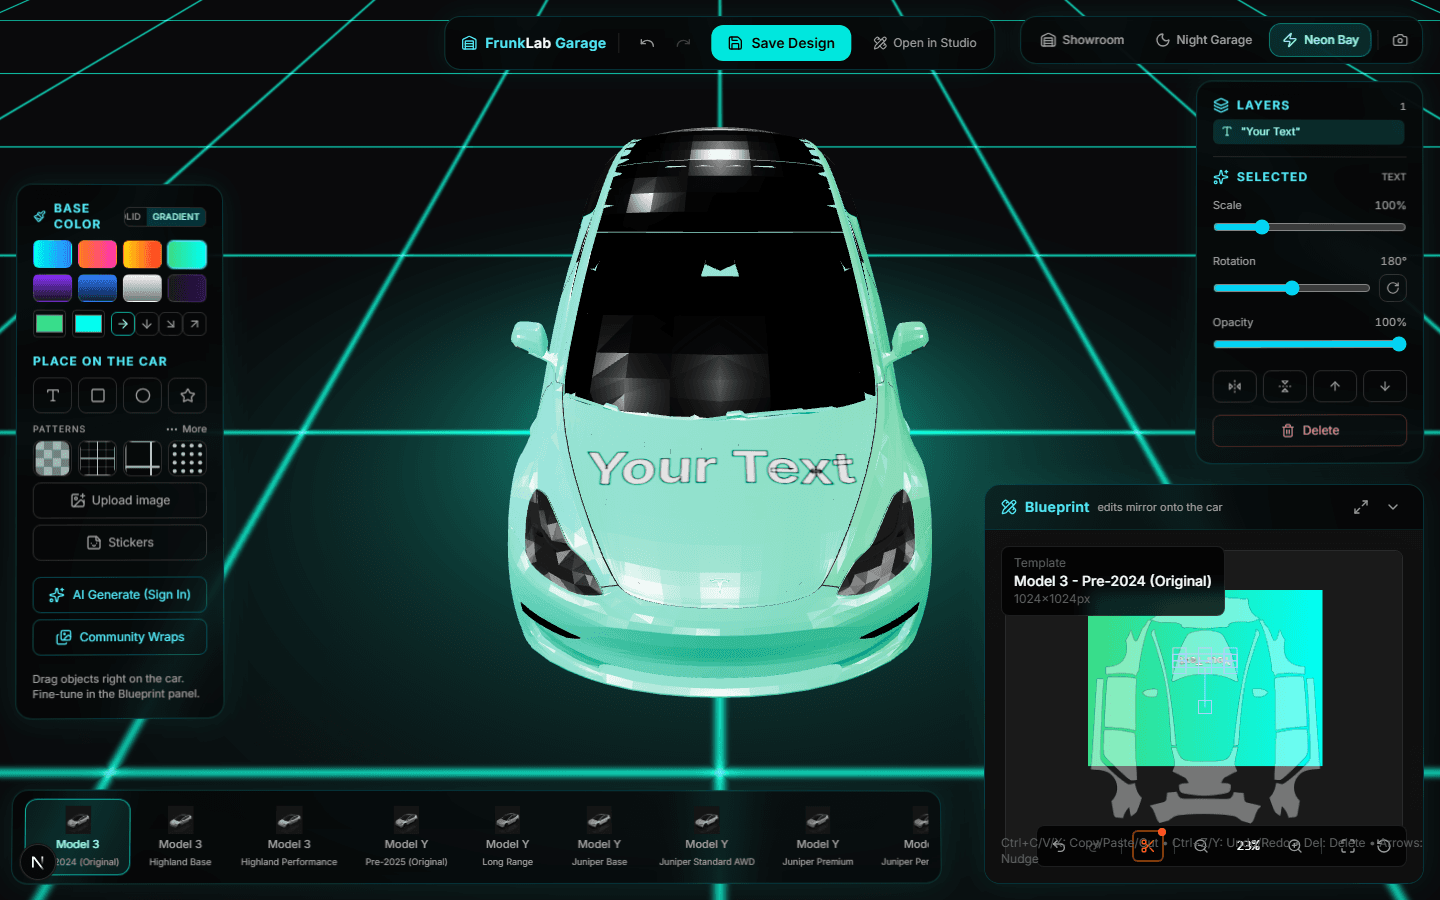
Step 9: fine-tune in the Blueprint
The Blueprint panel shows the flat template view, the same canvas the studio uses, with layers, alignment, and precise positioning. The 3D car and the Blueprint are two views of one design: nudge something in the Blueprint and it moves on the car in real time.
Use the car for composition and the Blueprint for precision. Centering text exactly, matching two elements' sizes, or deleting a buried layer is easier on the flat view.
Step 10: save, name, export
Hit Save. Signed in, you land on your design's hub page, where an AI quietly drafts a title and description in the background (you can overwrite both, and everything on the page autosaves). From there you can attach a sound, submit to the gallery, or download the wrap file.
Signed out, you can download the finished wrap directly or sign in to keep it. Either way the export is a Tesla-ready PNG, and the USB export tutorial covers the 2 minutes between the download and your car's screen.
Designs are fully interchangeable between editors, so a wrap started here can be polished in the studio later, and vice versa. Nothing about choosing the Garage locks you in.
That's the whole lap. Open the Garage and click your car.
Ready to design your own?
Open the studio