How to put a photo on your Tesla wrap without it looking scrambled
A pet, family or artwork photo looks scrambled as a Paint Shop wrap because Tesla's template is the car unfolded flat. How to place the photo on one panel the right way up, in the Garage, the studio or on a phone, then check and upload it.
 By Dex Moreno, Guides editor9 min read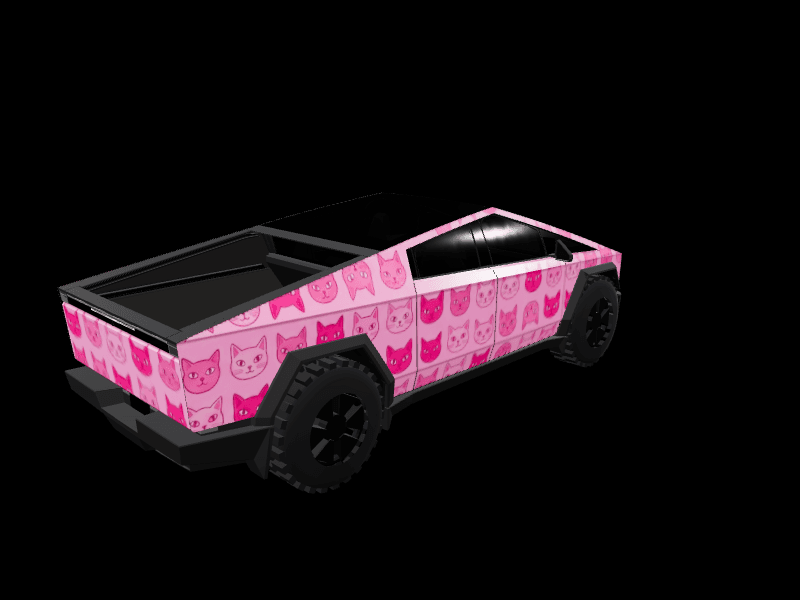
Quick answer: Don't send the photo to your Tesla as it is. Paint Shop only takes a PNG of 512 to 1024 pixels under 1 MB, and even a resized photo looks scrambled, because the wrap template is the car unfolded flat. Put the photo on one panel instead: in the Garage, upload it, click the hood on the 3D car, and it lands sticker-sized and turned the right way up.
A photo works on a Tesla wrap when it covers one panel, not the whole car. Stretch your dog over the full template and its face ends up on the roof glass, with the rest cut into pieces across the panels. Here's the fix in the Garage (the easiest way), in the studio, and on a phone.
Why does a photo look scrambled on the car?
Two problems, one after the other.
First, Paint Shop won't take a camera photo as it is. It wants a PNG of 512 by 512 to 1024 by 1024 pixels (1024 by 768 for the Cybertruck), under 1 MB, with a filename of up to 30 letters, numbers, spaces, underscores and dashes. A phone photo is a JPG or HEIC of about 4000 by 3000 pixels and several megabytes.
Second, a photo resized to pass still looks wrong. The wrap file is the car peeled and laid flat, seen from above:
- Top of the square: the front bumper and hood
- Bottom: the trunk or liftgate and the rear bumper
- Left and right edges: the two sides of the car, folded outward
- Center: the roof and glass, which the car draws as glass whatever you paint there
The Cybertruck's template is a 1024 by 768 landscape: front on the left edge, rear on the right, the sides along the top and bottom.
Your subject usually sits in the middle of the photo. The middle of the template is glass. So the face disappears and the rest gets cut across separate panels. Treat the photo like a decal instead: small, on one panel, and turned so its top points toward the roof.
Step 1: Pick a photo that reads at screen size
Paint Shop shows your wrap on a small 3D car on the touchscreen, so detail shrinks fast. Pick one clear subject that fills the frame, on a plain background. A dog's head and shoulders work. A family of six at the beach turns into six dots.
The Garage takes JPG, PNG and WebP. If your iPhone saved the photo as HEIC, convert it to JPG first (Settings > Camera > Formats > Most Compatible makes new iPhone photos JPG). Artwork needs to be your own, or art you have the rights to: characters and logos from films, games or brands are a rights problem.
Step 2: Open the Garage and pick your Tesla
Open the Garage on a computer. It's FrunkLab's 3D editor, where you design directly on a live model of your car. Pick your exact Tesla from the car card at the bottom of the screen: every version has its own template. The Garage walkthrough covers the rest of the editor. On a phone, skip to the phone section below.
Step 3: Upload the photo and crop it to the subject
Open the Place tab in the tool dock on the left and click Image. Pick your photo. A Crop Image window opens with a crop box locked to your car's template shape (square for most models, wider for the Cybertruck). Drag the corners in until the box hugs the subject, then click Crop & Apply. Skip Crop keeps the whole photo, which is fine if it's already tight. A banner then reads "Click the car to place your image."
Step 4: Click the panel where it should go
Click the hood on the 3D car (or a door, or the trunk). The photo lands there at sticker size, at most about a third of the template's width, and the Garage rotates it so it reads the right way up on that panel. Clicking the windshield or trim does nothing and you stay ready to place. Esc cancels.
Skip the banner's Place at center button for photos. The center of the template is the roof glass.
Step 5: Size it, then check every side
Drag the photo on the car to move it; the camera holds still while you drag. Fine-tune it with the Scale and Rotation sliders under Selected in the Layers panel on the right, or in the Blueprint, the flat template view. Give the rest of the car a color in the Paint tab, then spin the car and look from the front, the side and a few feet back.
What usually goes wrong here:
- A box around your pet. If the photo's background is plain (a wall, grass, sky), the Magic Eraser in the Draw tab removes one color with a click, so the dog sits on the paint instead of in a rectangle. Crop away busy backgrounds in Step 3.
- Too big. A photo wider than one panel crosses the panel lines and gets split.
- Too far forward. The top band of the template is the bumper as well as the hood, so a hood photo pushed toward the top edge runs onto the bumper.
Step 6: Save and download the wrap
Click Save Design. Signed in, you land on your design's page, where Download Wrap saves a Tesla-ready PNG under 1 MB. Signed out, Save Design offers Download Wrap straight away.
Saved designs start private and only go public if you press Submit to Gallery and the design passes review. Keep designs with your children's faces private.
Can you do it in the studio instead?
Yes, with one catch. In the studio, Crop & Apply treats any crop 512 pixels or more across as a full-car wrap: it stretches it over the whole template and pins it there. That's the scrambled look again. So:
- Click Upload Image in the left toolbar and pick the photo.
- In the Crop Image window that opens, click Skip Crop.
- The photo lands near the middle of the template, over the roof glass, at no more than half the template's width. Drag it onto the hood (or out to a side) and shrink it with a corner handle until it fits inside that panel.
- Turn it so its top points at the middle of the template. Select it, open Image Properties in the layers panel on the right, and set Rotation:
| Where the photo goes (Model 3, Model Y, Model S, Model X) | Rotation |
|---|---|
| Hood (top of the template) | 180 |
| Trunk or liftgate (bottom) | 0 |
| Left side of the car (left edge) | 90 |
| Right side of the car (right edge) | 270 |
On the Cybertruck it's 90 for the front (left edge), 270 for the rear, 180 for the top edge and 0 for the bottom edge.
- Watch the Live 3D panel as you work, or click Preview for the full-screen car.
What usually goes wrong: a photo that's square or close to it and at least 512 pixels on each side, like a social media crop, gets treated as a full wrap even after Skip Crop. Right-click it, choose Unlock, then shrink it with the corner handles. Same fix if you already pressed Crop & Apply.
Designing in other software? The same rules apply, and our guide to making a Tesla wrap in Photoshop, Procreate, Canva or GIMP shows how to set up the template.
How do you do it on a phone?
On a phone the studio opens on the AI prompt screen, and that's the easier route there. It won't paste your photo onto the car: the AI Tesla wrap generator draws an illustration of your pet into the wrap, so expect your dog's colors and markings, not a photo-exact likeness.
- Open the studio, pick your Tesla and tap Start Designing.
- Tap Photo under the prompt box. The AI Wrap Generator opens.
- Tap an empty Reference images slot and pick the photo.
- In Describe your wrap design, say where it goes: "my dog's face on the hood, the rest of the car in matching warm brown and cream."
- Tap Generate, then Apply to Canvas. The result shows on the 3D car. Tap Save to My Designs to keep it.
Don't skip the placement words. With an empty prompt, the generator usually reads the photo as a palette: it paints the whole car in your dog's colors instead of painting your dog. Each generation uses one of your monthly AI wraps (a free account gets 3; paid plans add more). On a computer, the option is Add reference photos in the AI box.
Want cats all over the car rather than one particular cat? That's a pattern, not a photo, like the Playful Kitten Parade Cybertruck in the gallery, and it's quicker to describe to the generator.
How do you check the file before uploading?
The Tesla wrap checker confirms a PNG meets Paint Shop's rules (real PNG, 512 to 1024 pixels, under 1 MB, a filename Tesla accepts) and fixes one that doesn't, in your browser. It can't fix a full-car photo: a square photo passes and still lands scrambled. The real test is the 3D car in the Garage or the studio's Live 3D panel.
How do you send it to your Tesla?
In the Tesla app, go to Creations > Wrap > Upload, pick the PNG and apply it. You need Tesla app 4.59.1 or newer and car software 2026.26 or newer. On older software, copy the file into a folder named Wraps at the top level of a USB drive (exFAT or FAT32, never NTFS), plug it in and open Toybox > Paint Shop > Wraps. Our tutorial on uploading a wrap from the Tesla app shows each screen, and your first Tesla wrap covers the studio basics.
Frequently asked questions
Can I put a picture of my dog on my Tesla wrap? Yes, on one panel rather than the whole car. In the Garage, upload the photo and click the hood on the 3D car: it lands at sticker size, rotated to read the right way up.
Why does my photo look weird in Paint Shop? The wrap file is the car unfolded flat. The middle of the template is the roof glass and the sides fold outward, so a full-size photo gets cut across separate panels and its middle disappears into the glass.
Does the AI put my actual photo on the car? No. With a reference photo and a prompt that names a spot, like "my dog's face on the hood," it draws an illustration of your pet there, not an exact likeness. For the photo itself, use the Garage or the studio.
Will other people see the photo on my wrap? Only if you submit it. Saved designs start private and reach the public gallery only after you press Submit to Gallery and the design passes review.
Pick your sharpest photo, open the Garage, and click the hood.
Put a custom wrap on your Tesla
Free community designs for every model, or make your own in the browser.


